Showing posts with label 60's dress. Show all posts

Tuesday, February 1, 2011

Pink Houndstooth Mod Mini Dress

I completed View 3
(ABOVE)


Okay, so after one so-so project and one semi-disaster, we finally come to a project that was successful.

Presenting Simplicity 6783 (1966, view 3) ...

HIGHLIGHT REEL:


1.) FABRIC: This project represents a milestone for me. I FINALLY got up the nerve to buy fabric online instead of at Joann's. I got this cotton-lycra stretch knit on eBay from the seller "fabricattackfabrics." I was really pleased with the fabric. It was lightweight and stretchy, plus the pink and black houndstooth is very mod to me. The pattern reminded me of something Mondo would have done on last season's Project Runaway. I'm still pissed that he lost--ARRRGH!

Before hemming
(ABOVE)


Why was I reluctant to buy fabric online? The obvious reasons: can't feel the texture; can't feel the weight; etc. Since this dress was made, I've now bought about 15 different fabrics online. I was only disappointed with one fabric that I bought. The odds have become better than Joann's, and you cannot beat the selection. As I wrote previously, I now have a vintage fabric fetish.


2.) STYLE: Like I said, I thought the look was very Mondo. I like the unexpected combo of pink with houndstooth. The houndstooth print size was about an inch, so you could see the detail well. I also love adding chain belts- SO MOD!


3.) NECK HOLE: This was my only construction problem. I naively thought that this fabric was so stretchy that I could make it a pullover. I think I already made this mistake before, so I don't know why I made it again, but the neck hole once again became too stiff when I added the collar. I couldn't get my head through-- it looked like the dress was giving birth to me! So, I ended up leaving the seam open a few inches at the top so that I can fit my head through. I think I'll add a hook and eye to make the closure better, though. Is this an okay alternative to short neckline zippers? Is there any other way I could have dealt with this problem?

Closeup of the pink houndstooth print
(ABOVE)

I really loved this pattern and plan to make it again in the future using a different fabric. In the future, I'll probably try to make it with a vintage polyester fabric and sew it in a classic a-line shape. This time around, I was using a really stretchy modern fabric, and I felt it was more conducive to a tight/body con look.

Happy sewing!
Astrid

Monday, January 31, 2011

Blue Charmeuse Dress or "The Great Country Club Dress Disaster of 2010"


This is my "please don't take pictures when I'm trying to do something" face
(ABOVE)


Mr. Seam Ripper makes an appearance
(ABOVE)

Before hemming
(ABOVE)

Okay, so I said in the last post that my disaster quotient has gone down. This dress is somewhat an exception to that statement. Although, it could always be worse.

Presenting Butterick 4029 (mid-60's?, not dated) :

1.) FABRIC: I made view E using blue charmeuse. Another fabric that was picked out before I realized that Joann gives me fabric goggles. So again I just went with it. The charmeuse was a little easier to sew than the crepe. Still not a great fan of that type of fabric, though. My original vision was of a brocade dress, but I chickened out after reading horror stories about how you can't mess up with brocade. I read that the fabric has a long memory. I guess it's sort of like "brocade never forgets" just like those darn elephants. Also, I read it ravels and ravels.


2.) STYLE: I tried to maintain the "a-line" shape on this dress, but it looked like a weird prom dress sack. So, I tightened it a tad, and it looked a tad better. However, I still think the result is very "country club." I could imagine Sandra Bullock wearing this to a fundraiser in that movie "The Blind Side." It just does not fit my personality one bit. If I'd went with brocade, I bet it would have looked a lot more retro. I'm still not sure it would have been a "success" though.


3.) BOATNECK? MORE LIKE A YACHTNECK: Yeah, so this is supposed to be a boat neckline. I don't usually wear boat necks, so it didn't occur to me that I would have issues with the neckline being too wide. There's probably a reason why I don’t wear boat necks normally. Lesson learned.


The biggest problem with this dress was the style. It's just NOT me. So, why did I make a dress that doesn't fit my personal style? For me, part of sewing is trying new things. Just like I get "fabric goggles," I get "pattern goggles." I think "Wow, what an interesting look. I wonder if I could make that?" I've tried to be more careful since this project. I'm trying to learn to ask myself first and foremost, "Would this look good on ME? Is this a good style for ME?"

It looks better in pictures than in person, but whatever the case, I don't feel like going to a mixer at the local country club, so it's not much use to me
(ABOVE)

I think I like the backside better than the front--love the darting
(ABOVE)

Live and learn. It's that simple. And if all else fails, I can always become a White House intern!

Oh and I'm really happy to be done with this post, because I'm sick of having to spell charmeuse!

Happy sewing!
Astrid

Simplicity 6861 from 1966: Sea Green Crepe Dress


I've fallen behind, yep again, on my posts. It's not all bad, though. I've fallen behind partially, because I'm now completing projects faster and more efficiently. I'm happy to report that most of my latest projects have been successful, which is a good thing, because my scalp was starting to hurt from all that hair pulling. The project I'm about to present was completed about 2 months ago.

Presenting Simplicity 6861 from 1966....

HIGHLIGHT REEL:

1.) STYLE: This was one of the patterns I picked out from the "Mad Men" style. Although the date is a little later than the series, view 1 evokes the "Mad Men" era more so than it does the mod/psychedelic styling of the latter half of the sixties. In the previous "Great Wiggle Dress Disaster" post, I mused as to whether this style is right for me. The answer is "yes" and "no." I think the mod/60's style better fits my personality and ascetic. But, I'm not quite ready to discount the early 60's. I especially appreciate the silhouette fashion from that era creates. I added my knee high boots to the dress, though, to give a slightly more modern edge. I'm not sure if they work or not, but I don't think I can necessarily pull off a "literal" mad men/pin-up look.

2.) FABRIC: I'm not a big fan of polyester crepe. That's a major lesson learned from the project. While it doesn't necessarily show on the finished product, I didn't like the way the crepe tended to ripple due to its weight. Why did I pick this fabric to begin with? Well, I previously mentioned that Joann's lousy selection has been contributing to my poor fabric choices. I see a color I love and then I buy the fabric, even though I'm not a big fan of the "type" of fabric. This happens even when the fabric is not appropriate for the project. It's like I have "fabric goggles" on. I think the fabric is a Johnny Depp when in reality it's just a Rush Limbaugh. So, why did I let the fabric goggles distort my judgment again? Well, I had already purchased the polyester crepe for this project BEFORE I made the realization about Joann's. So, I figured what the hell. I had never sewn polyester crepe, so who was I to judge it before trying it?


3.) TO SLEEVE OR NOT TO SLEEVE?: After I'd gone through the horror of making my first-ever sleeves of this type, my husband asked this terrifying question: "Are you sure this dress wouldn't look better sleeveless?" I furrowed my brow, I gasped, and I almost cried (well, not really).

To test his guess, I pinned the finished sleeve to the armhole and then looked at myself as sort of half-man, half woman (or rather half sleeve, half no sleeve). So, after I'd toiled at learning how to do gathering for the first time, it was decided: the thing DID look better without sleeves. I hated to admit it, but it was true. Oh well, at least I now know gathering is not that hard.

The half sleeve, half no sleeve look
(ABOVE)

4.) COLLAR: The pattern collars are always too big for me. I think I cut off a little too much when I made my adjustment, though. Oh well, I don't think result is too noticeable.

5.) STAY STITCHING: Did I mention I quit stay-stitching about 3 projects ago? I haven't noticed any problems with my sewing as a result, and it was becoming such a tedious bother. I enjoy sewing so much more now that I'm not stay stitching. Okay, be honest-- do you think I'm being bad here?


6.) IRONING: Still hate it.


7.) ACCESSORIES: Without a belt, the dress looks awful. I suppose the belt is integral given that the pattern maker shows the dress belted on the pattern envelope.

Without the belt, I think it looks vaguely like a fancy trash bag, if there is such a thing...
(ABOVE)

So, that's about it for this one. Don't "love" it, but I certainly don't hate it. That's good, right?

Happy sewing!
Astrid

Tuesday, December 28, 2010

McCall's 6978 from 1963: Aka The Great Wiggle Dress Disaster of 2010

It looks so pretty on the envelope....
(ABOVE)


Raglan sleeves or as I like to call them, "the beginning of the end"
(ABOVE)

So blissfully ignorant
(ABOVE)

Okay, trying to catch up here. Hopefully, posting two today will alleviate some of the guilt I feel for having such a huge backlog!

This particular dress was made right before Thanksgiving. I remember this, because I wanted to wear it to my friends' house for Thanksgiving, but the results did not allow it. I'm trying not to be so hard on myself, because this was my first wiggle dress. After recently hopping onto the "Mad Men" bandwagon (I'm in the middle of Season 3), I was really excited to make it. Disappointment is worse when you're really excited about a particular project.

Presenting the highlight reel for McCall's 6978 from 1963:


1.) FABRIC: I used a synthetic suede fabric from Joann's (really getting sick of their selection, or lack thereof). I was nervous to sew it, because I fell absolutely in love with it when I saw it and was in awe of its beauty. The texture and color reminded me of a really swank vintage couch. It seemed like it would make for a wiggle dress with an edge. But... there's an important lesson here. No matter, how much you love the fabric, use some sense already, ASTRID! Why, oh why, did I use a fabric that had NO STRETCH for a wiggle dress. I can hardly walk in the thing! When I was trying it on after it was finished, I dropped something, and I had to ask my husband to pick it up for me. Now, I know that wiggle dresses can be a little awkward, but if there was some stretch, I could have managed. This is bloody ridiculous. The fabric is so stiff, it hurts to bend my elbows.

You can hardly see the "V" shape on the front. Maybe I shouldn't have used black.
(ABOVE)

This isn't the first time my fabric choice was really stupid. But, I've finally developed a theory as to why I make these mistakes: Joann's selection of colors, prints, and textures is so limited that I end up picking a wrong material, because I can't find the right material in the right color, print, or texture. I go against my best judgment, because something "shiny" catches my eye, and I can't find it in a material that will work. I've tried to explore other fabric stores locally, but most just sell upholstery fabric. One in my neighborhood has really cool prints, but only in a 100% cotton material that reminds me of quilting fabric (which I don't care to use). Several projects from this one, I started buying fabric online and have been happy with the results. More on that later, though.

The fabric looked like a swank couch in the store. On the dress, more like a garbage bag.
(ABOVE)

2.) FRONT SEAMS/RAGLAN SLEEVES: I am pretty sure I'll never sew raglan sleeves again. I probably said this already and then did it again, but this time I mean it. I've set aside all my patterns with raglan sleeves and will be reselling them. With the suede cloth, the raglan sleeves kept bunching at the armpit. Plus, they were too baggy for me, and when I tried to adjust them, the bunching only got worse. I know...I know...I should be doing a FBA, but I've found that isn't necessary for me with most 34B patterns. When I have shoulder seam problems with set in sleeves, I just cut the shoulder shorter, so the sleeves don't fall off my shoulders. That works perfectly. This pattern, though, probably needed a FBA. Why won't I learn FBA? I don't see it as having enough utility for the kind of styles I'm making, since I've already figured out a way to fix almost 100% of shoulder problems I run into. Raglan sleeves have been one of the few exceptions. I'm not that wild about how they look on me, so I don’t consider avoiding them a big loss.

It doesn't LOOK bad... if only I could move...
(ABOVE)


3.) HAIR STYLING: Unfortunately, my normal everyday look doesn't really match the Mad Men/pin-up style. I have long straight hair, and I have no idea how to curl it in a way that would make it look late 50's/early 60's. Most women in that era didn't have hair nearly as long as mine, so I question whether styling my hair in that manner is even possible. Plus, my hair is really fine and hates the curling iron. That doesn’t help.

4.) ACCESSORIES: For some reason, this dress just does not look like the right era. I think it's my hair, but I'm not sure. Perhaps if someone with the right hairstyle wore the dress, it would look Mad Men-esque. I tried to add accessories such as the beret, red belt, and red shoes. Those did help. However, I couldn't shake the feeling that this dress was looking kind of 80's instead of 50's or 60's. Anyone have any ideas? Is it my long straight hair being incongruous with that era that is causing the problem? Is the Mad Men style wrong for my "look"?

Take the picture already. My elbows hurt!
(ABOVE)

5.) GATHERING: I omitted the instructions to "gather" at the waist. I think I know how to do that now, but it didn't really affect the outcome to omit it.

So, what's the lesson here? You probably shouldn't make a dress you can't move in. Yeah, don't do that.

Happy sewing!
Astrid

Monday, November 1, 2010

Simplicity 7345 from 1967- Mod Red and Black Colorblock Dress

Simplicity 7345 from 1967- View 2
(ABOVE)


WTF?
(ABOVE)


I love knits because I love pinking-- such a nice, lazy way to finish seams
(ABOVE)

Well, I've been sewing but I haven't been posting much. It's been a pretty busy month, but I've managed to get in some sewing now and then. I've made three dresses this month that I haven't posted so I'll have more to come very soon.

But first, let's begin with Simplicity 7345 from 1967. And here's the rundown:

1.) PATTERN SIZING: This is the second pattern that I have done with the 34 bust. So many of my fitting issues were solved by going down a size. As Michael Scott would say, "That's what she said." But seriously, this one went pretty well.

2.) SHOULDER SEAMS/ARMPIT AREA: The biggest issue that I face with the 34 bust is armpits/shoulder seams. If I leave the shoulder seams as is, the seam still falls off my shoulders. It's not as pronounced as the 36 bust, but it still isn't what I want. I have fairly wide shoulders and if I don't adjust the shoulder seams, I end up changing my shape from hourglass to inverted triangle.
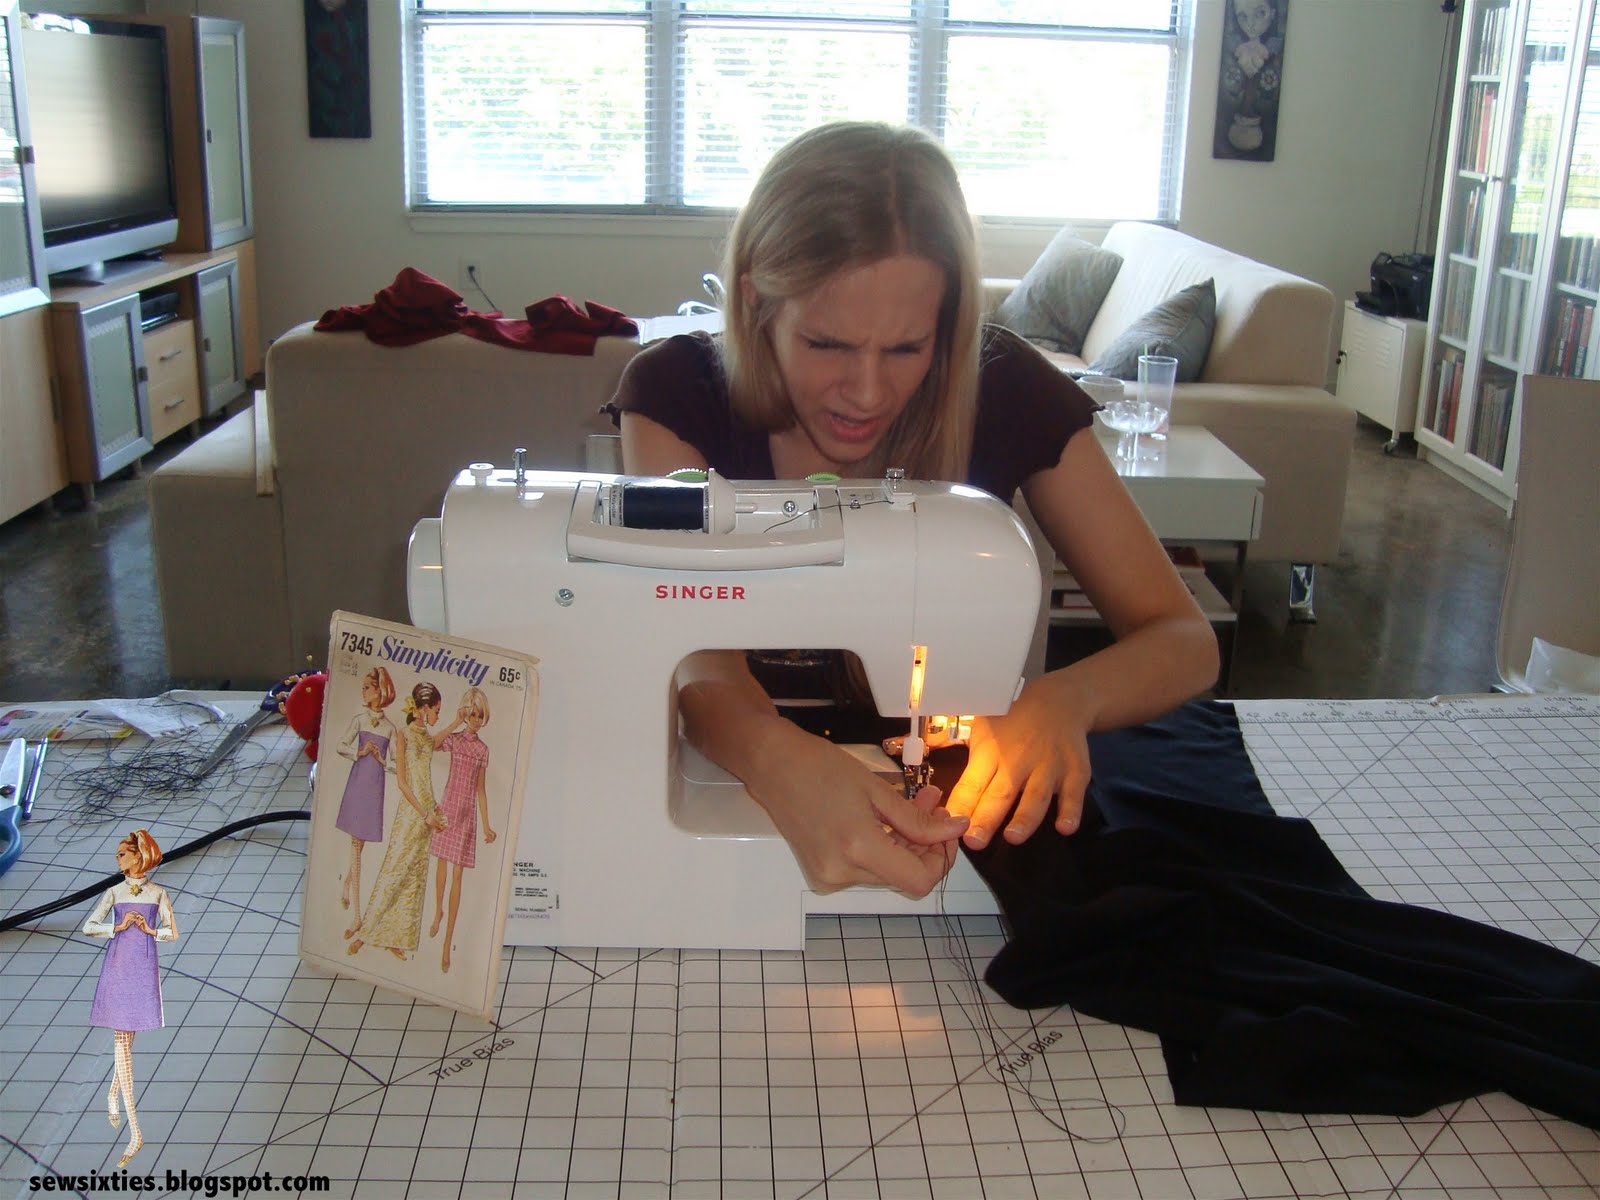
Mid-way through & footwear challenged
(ABOVE)

How do I fix the shoulder seams? Well, I must say, I'm definitely in the lazy sewer category, so I know all the meticulous seamstresses out there will cringe at this one. Do I adjust the fit by redrawing the pattern during the cutting phase as a careful sewer should do?

Uh...well...actually no. I lay out my garment, grab my ruler, and use my chalk to draw a line from the armpit up to the shoulder seam. Then, I grab my trusty scissors and cut, hoping that I don't get scissor-happy and ruin everything. But I do use my ruler and I do measure the shoulder seams on RTW dresses that fit well in the shoulders, so that I know how much to cut-off. So far, this has worked well (no Lorena Bobbitt moments here), but I have to be careful not to cut off too much in the lower part of the armscycle. Wow, I used a big sewing word...but I don't think I spelled it right. At least it's better than calling it what I used to call it-- i.e. "that armhole thingy."

By the way, it might be more disastrous if I tried redraw my pattern. I got a D once on an Industrial Tech project that involved drafting. I'm pretty sure I cried.

I'm not crying here-- I think that means success
(ABOVE)

Back/Side View
(ABOVE)

The other big problem: the armpits. The bottom of the armscycle is too low with the 34 bust. I read in one of my sewing books that the bottom of the armscycle is supposed to fall approximately 1/2 inch under the armpit when the pattern has set-in sleeves. I ended up adjusting that issue by bringing in the seam line at that area by a couple inches. There was plenty of give, so it was easy to just pull it in. (Must resist "that's what she said" jokes) This seemed to cause the armscycle to migrate northward, which fixed the problem. On some previous patterns, I always had excess fabric (sort of like a bat-wing style sleeve) at the armpit area. I prefer a more tailored fit in the armpit area, so I'm glad I'm learning to fix this problem. A few dresses later, I found myself getting better at adjusting this area.

3.) THREAD: So, I bought this new black thread, because I was running out the previous brand I had bought. It said it was "all-purpose sewing thread." Is it possible that this is a fallacy? For some reason, this thread and my fabric did not mix. The thread kept bunching up in my machine, which in turn seemed to get my fabric caught in the feed dogs. When I first bought the new thread, I noticed that it was thicker than my previous thread, but I thought maybe it was just a better quality. Now I'm thinking it was somehow too thick for the fabric, which I'll get to next.

The shitty thread in action
(ABOVE)

4.) FABRIC: This time around I used ponte roma polyester. I was getting sick of the ponte roma, but it turns out there are different types, because this PR poly felt very soft and didn't have the same roughness of the previous PR I used. So, the question is whether that thread and the soft PR were somehow incompatible?


5.) HEM: This hem turned out better than any previous hem. I turned the bias tape inside again (as was so helpfully recommended--thank you, thank you!). This time, the fabric had more weight, so the method worked better. I am so excited by this hem that I want to redo all my previous hems, and I'm actually excited to do it. I'm having a major dork-out moment ; - )

So, overall, success! I'm not necessarily "wowed" by this one either, but I do like it, and I am proud to say that with each dress, I'm working out the various fitting issues.

Happy sewing!
Astrid

It looks like a mod take on the Star Trek the Next Generation uniform
(ABOVE)